
This post summarizes some steps to install PVWA (Password Vault Web Access)
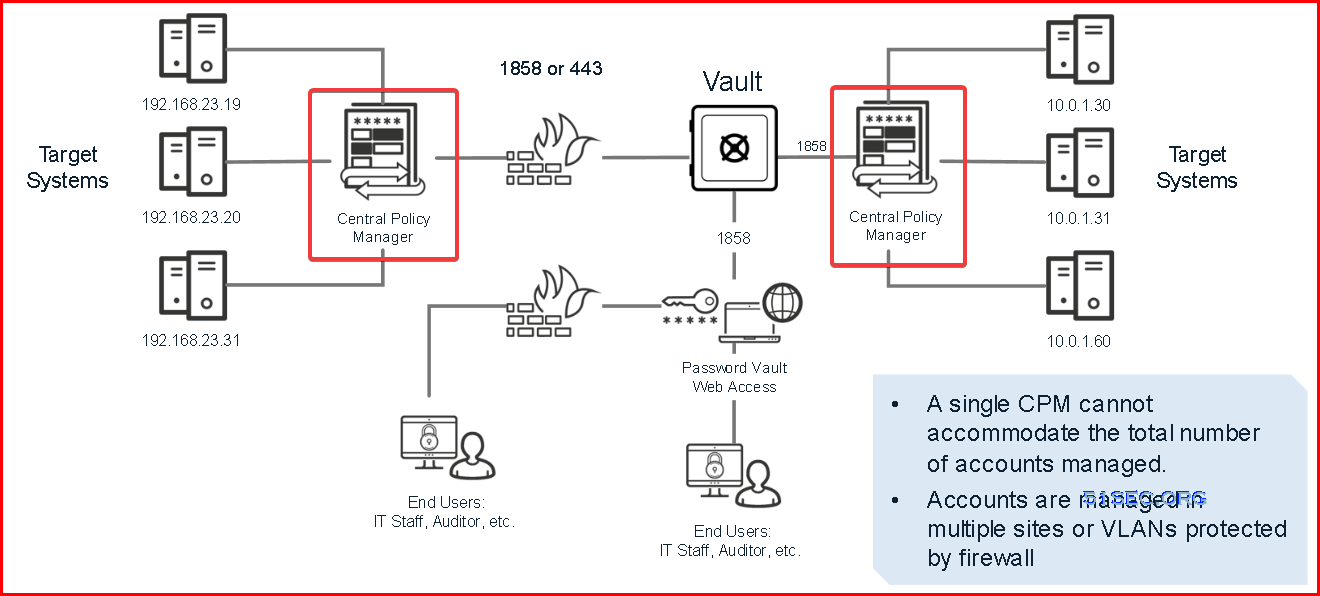
Diagram

System Requirements
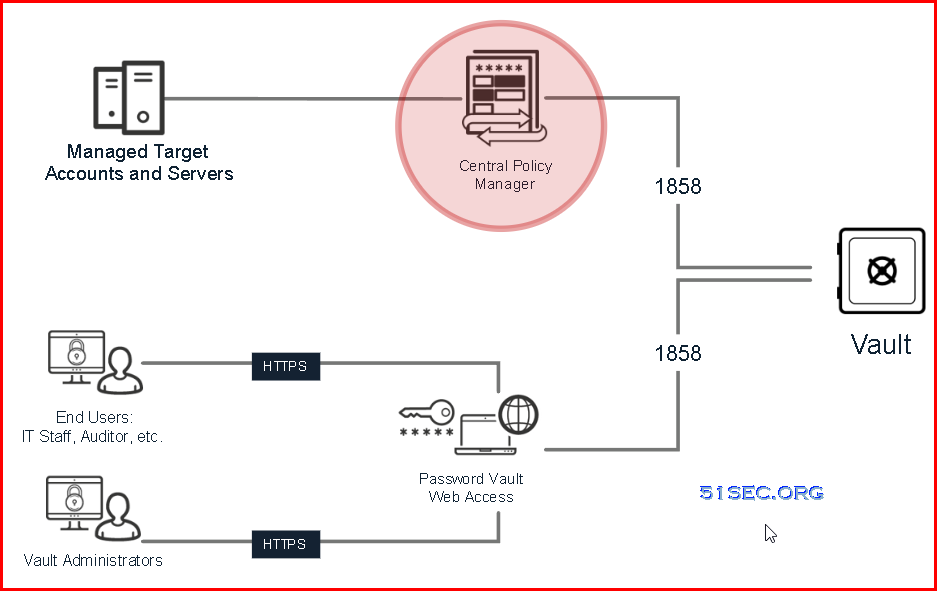
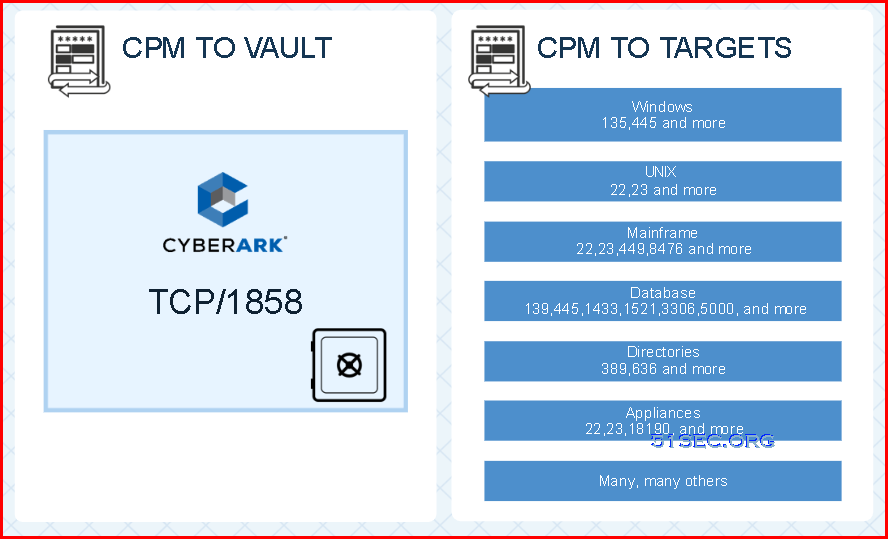
CPM should place to location close to the end targets, such as servers or applications.
Architecture


Installation Prerequisite
The CPM_PreInstallation.ps1 script automates and performs the following tasks:
- Verifies .NET version
- Sets IIS SSL TLS configuration
To run the CPM_PreInstallation script:
-
Copy the CPM folder from the installation package to the CPM server, and unzip the folder.
-
In the InstallationAutomation folder, locate the CPM_PreInstallation.ps1 file.
-
Open the PowerShell window, and run the CPM_PreInstallation.ps1 file as Administrator.
Installation CPM using scripts
1 Install CPM using scripts
- In the CPM\InstallationAutomation\Installation folder, locate and open the InstallationConfig.xml file.
-
In the InstallationConfig.xml file, specify the following parameters:
Parameter
Description
Username
The name of the user running the installation.
Valid values: Username
Default value: Windows User
Company
The name of the company running the installation.
Valid values: Company name
Default value: My Company
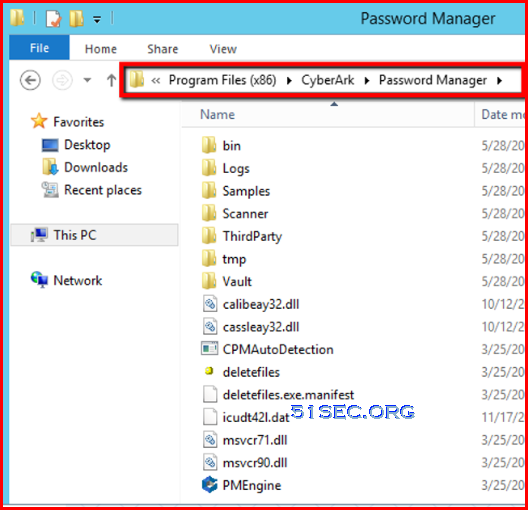
CPMInstallDirectory
The path where CPM is installed.
If the path is more than 260 characters, enable the LongPathsEnabled setting.
In the Registry Key settings, go to HKEY_LOCAL_MACHINE\SYSTEM\CurrentControlSet\Control\Filesystem > LongPathsEnabled, and change the value from 0 to 1. Reboot the machine to recognize the new key setting.
Valid values: Pathname
Default value: C:\Program Files (x86)\CyberArk\
isUpgrade
Whether this is a CPM upgrade or a new CPM installation.
Valid values: True/False
Default value: False
- In a PowerShell window, run the CPMInstallation.ps1 script as Administrator.
The registration process connects the CPM to the Vault.
-
In the CPM\InstallationAutomation\Registration folder, locate and open the CPMRegisterComponentConfig.xml file.
-
In the CPMRegisterComponentConfig.xml file, specify the following parameters.
Parameter
Description
accepteula
Acceptance of the end user License agreement.
Valid values: Yes/No
vaultIP
The IP address or hostname of the Vault server.
Valid values: IP address or hostname
vaultport
The Vault’s configured communication port.
Recommended default Vault port: 1858Valid values: Port number
vaultuser
The name of the Vault user performing the installation.
Valid values: Username
We recommend using the Vault administrator user to install CPM as this user has the appropriate Vault authorizations, and is created in the appropriate location in the Vault hierarchy.
For more information about the required authorizations, see Vault user authorizations.
Whether or not CPM is installed in POC mode.
Valid values: True/False
installDirectory
The path where CPM is installed.
Specifiy the same value as the CPMInstallDirectory value in the InstallationConfig.xml file.
Valid values: Pathname
Default value: C:\Program Files (x86)\CyberArk\
username
Sets the CPM user name. CPM Safe names will be created according to the user name that you specify.
If the user name is already in use, a sequence number will be added.
Example: PasswordManager1, PasswordManager2 and so on.
Default value: PasswordManager
isUpgrade
Indicates whether the registration is for a clean installation or an upgrade.
Valid values: True\False
Default value: False
-
In a PowerShell window, run the CPMRegisterComponent.ps1 script as Administrator, and provide the Vault password in one of the following ways.
Method
Command
As a secure string (recommended)
CD “<installation package Path>InstallationAutomation\Registration” .\CPMRegisterComponent.ps1 -spwdObj <vaultpassword>
Use a Windows authentication window (recommended for manual runs)
CD “<installation package Path>InstallationAutomation\Registration” .\CPMRegisterComponent.ps1
As clear text (not recommended)
CD “<installation package Path>InstallationAutomation\Registration” .\CPMRegisterComponent.ps1 -pwd <vaultpassword>
Install CPM using installation wizard
This installation process installs the CPM and connects to the Vault (registration).-
On the CPM machine, create a new folder, and copy the Central Policy Manager folder from the installation package to the new folder.
-
Start the installation procedure by doing one of the following actions:
-
Double-click Setup.exe
-
On systems that are UAC-enabled, right-click Setup.exe, and then select Run as Administrator.
The Setup window appears.

You can exit installation at any time by clicking Cancel. You can return to the previous installation window by clicking Back, when relevant.
-
-
Click Next.
A list of applications appear that must be installed on your machine prior to the CPM installation.

-
Click Install.

-
Read the license agreement, and then click Yes.

-
In the Customer Information window, enter your name and Company name in the appropriate fields, and then click Next.

-
In the Destination location window, do one of the following actions:
-
Click Next to accept the default location where the CPM will be installed (displayed in the Destination Folder area).
-
Click Browse, select another location, and then click Next.
-

-
-
In the Setup Type window, select No Policy Manager was previously installed, and then click Next.

-
In the Vault's Connection Details window, enter the IP address or DNS of the Vault and its port number, and then click Next.

-
In the Vault's Username and Password Details window, enter the name and password of the Vault user who will create the CPM environment in the Vault, and then click Next.
Use the Vault administrator user to add the complete installation, and create it in the appropriate location in the Vault hierarchy.
Only the Vault administrator user has permissions to add the new platforms. If they are not added automatically during installation, you can import them manually after the installation.
The installation process begins, and builds the CPMenvironment in the Vault and on the CPM machine.
-
If there is an existing PasswordManager user in the Vault, the following window appears.

Do one of the following actions:
-
Accept the default CPM user name
-
Enter a different name
-
-
Click Next to continue with the installation.
-
If the cpm.ini file already exists in the Vault, the following
the following window appears.

Do one of the following actions:
-
Click Yes to override the existing cpm.ini file
-
Click No to leave the existing cpm.ini file in the Vault
-
-
-
In the Setup Complete window, click Finish to complete the installation.
- Restart the machine.


During installation, several Vault objects are created to enable the CPM to access existing passwords, generate new ones and replace them on a remote machine. However, before the CPM can begin working, it is recommended to create a Trusted Network Area for the CPM user to log on to the Vault.
Make sure that the CPM user can only log on to the Vault from the CPM machine.
To create a trusted network area:
-
Create a Network Area that includes only the IP address of the CPM machine, and from where the CPM user will log on to the Vault.
-
In the User Properties window, add this network area to the user’s Trusted Network Areas.
-
Restart the following services:
-
CyberArk Password Manager service
-
CyberArk Central Policy Manager Scanner
-

Hardening
The CPM hardening process is a series of tasks that enhance security on the Windows Server machine. Hardening is performed after CPM installation.
Hardening consists of the following tasks:

- In-Domain Automatic Hardening via GPO
- Out of Domain Hardening via INF import
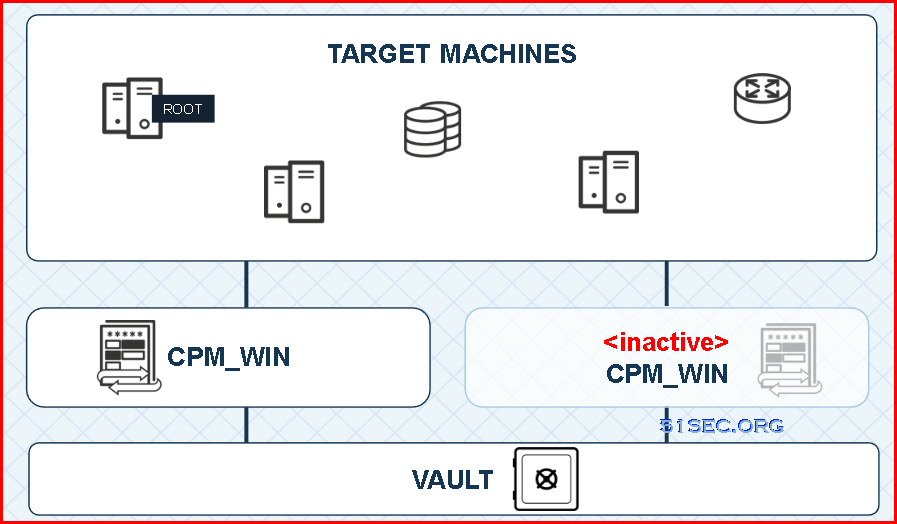
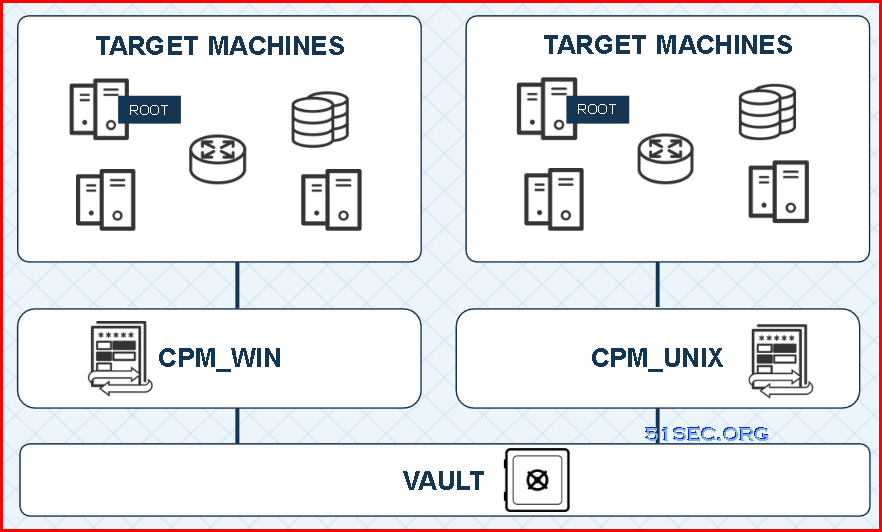
Multiple CPMs
via Blogger http://blog.51sec.org/2022/06/cyberark-121-lab-4-cpm-installation_21.html
June 21, 2022 at 02:48PM CyberArk
 RSS Feed
