
I had a couple of posts in this blog to show you how to use Rclone to mount some different cloud drives, especally for Google Drives and OneDrives. Unfortunately the process for generating refresh_token using your own client_ID and client_secret is not documened clearly or already outdated in those posts. With recent changes from Google blocking Web GUI Rclone access request, I am writing this post to record those steps with screenshots with the referencef rom Rclone documentation.
Related Posts:
- Using Rclone To Add Free Cloud Storage to VPS & Execute Read/Write Performance Test
- Use Rclone To Mount Azure Blob Storage into Local Windows File System
- Use Cloudflare Workers with Rclone to Deploy A Cloud Drive Index & List App - OnePoint
- Build Cloud Download Site Using One Docker (FileBrowser+Aria2+AriaNg+Rclone+Caddy)
- Mount Google Drive into NextCloud Using Rclone
- Use Aria2+AriaNg Docker to download and Use Rclone to Sync To Cloud Drives
OneDrive to Create a New Client ID & Secret
- https://learn.microsoft.com/en-us/azure/active-directory/develop/howto-create-service-principal-portal
- https://rclone.org/onedrive/#getting-your-own-client-id-and-key
Register an application with Azure AD and create a service principal
Let's jump straight into creating the identity. If you run into a problem, check the required permissions to make sure your account can create the identity.
-
Sign in to your Azure Account through the Azure portal.
-
Select Azure Active Directory.
-
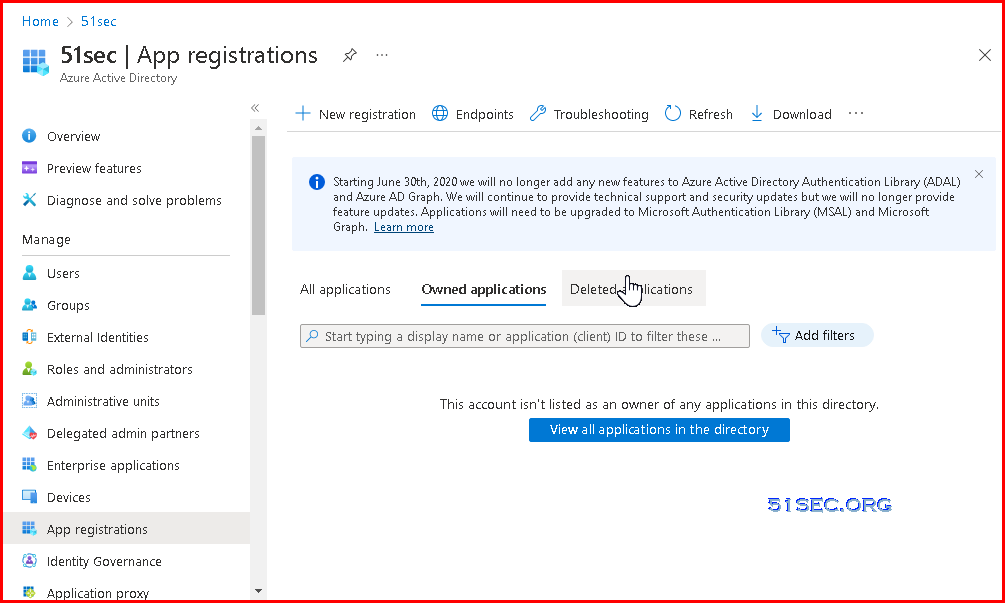
Select App registrations.
-
Select New registration.
-
-
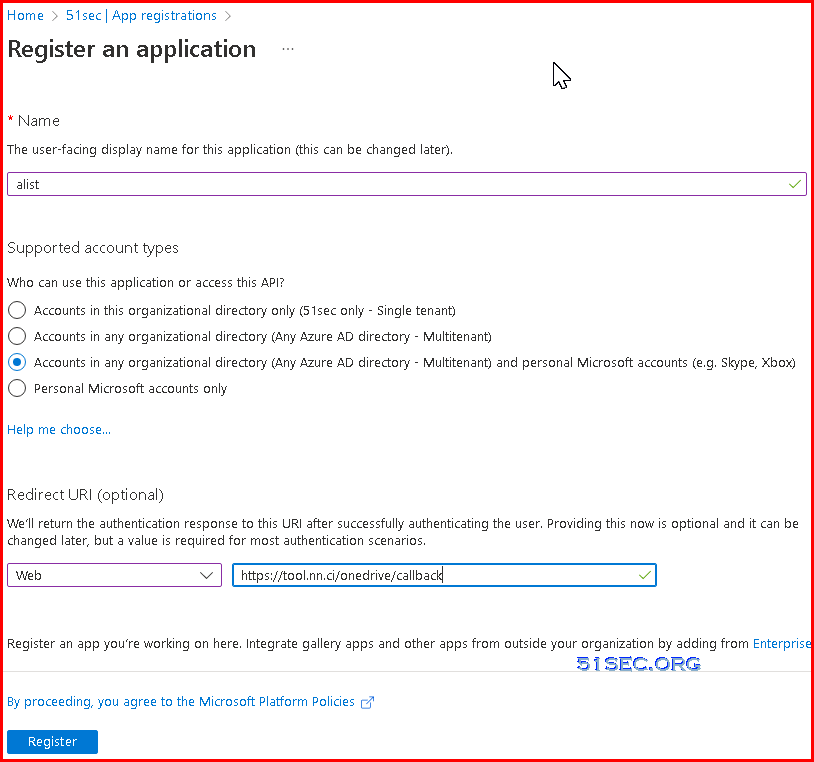
Name the application, for example "example-app". Select a supported account type, which determines who can use the application. Under Redirect URI, select Web for the type of application you want to create. Enter the URI where the access token is sent to. You can't create credentials for a Native application. You can't use that type for an automated application. After setting the values, select Register.
-
-
Create a client id and password:
Certificate and Password, click New Client Password, enter a string of passwords, select the one with the longest time, and click Add (Note: The password entered after adding will disappear, please record the value of client_secret)
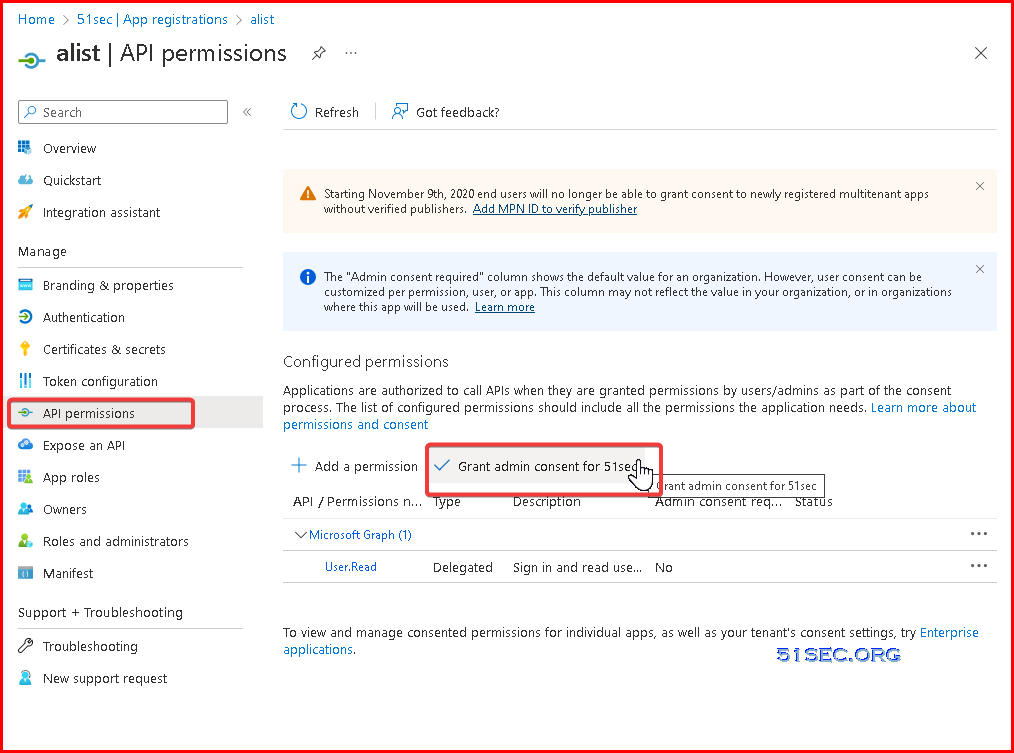
API Permissions, click MicroSoft Graph, enter file in the Select Permissions, and check Files.read (Note: Files.read is a read-only minimum permission. The permission in the figure is larger, and the same can be done ), click Update Permission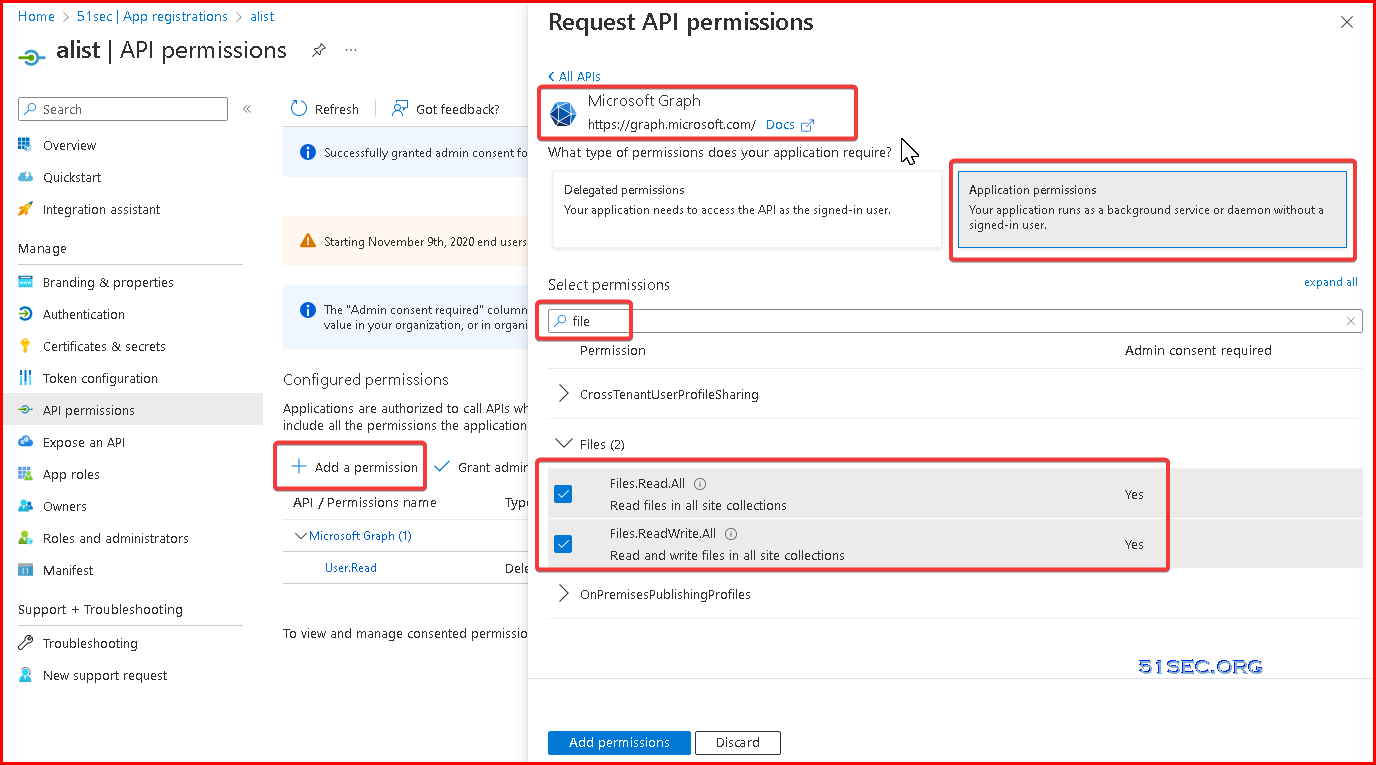
Generate OneDrive/SharePoint Token
Using Rclone to Get Token
- Download Rclone to local PC (https://rclone.org/downloads/)
- Unzip zip file then go to
rclone.exe folder,typecmdfrom file explorer's address box, then press enter to open command line window from current folder location. ReplaceClient_IDã€Client_secret from following command,then execute the command
A browser window will be popped up to ask you to enter your OneDrive account to get authentication. After completed authentication successfully, your command line window will get following information:
{"access_token":"xxxxxxxxxxxxxxxxxx","expiry":"2020-02-22T21:18:39.5036298+08:00"} You will find the access token informaiton.
Get refresh token Using Online Tool
Fill in the client_id and client_secret obtained in the previous step into the https://tool.nn.ci/onedrive/request page, click Get Refresh Token, you can get the refresh token
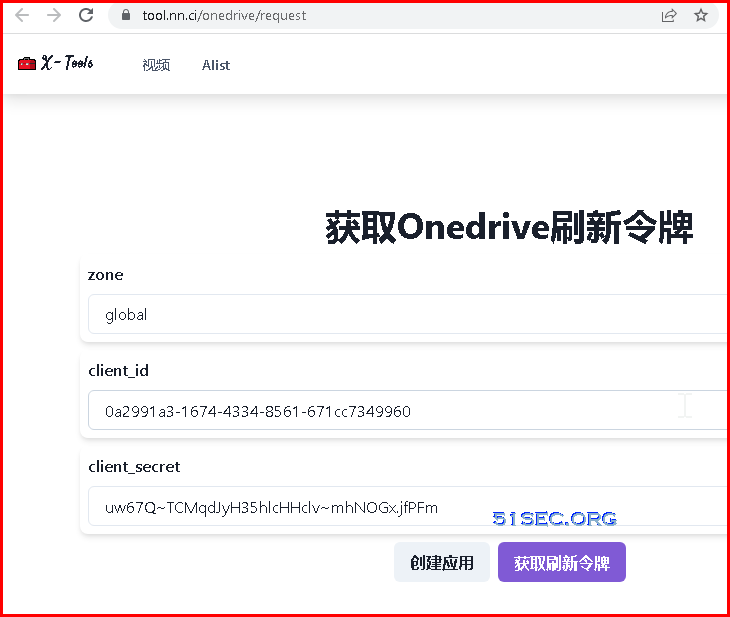
Click purple button to fetch refresh token. It will ask you log into your Microsoft Onedrive account.
Google Cloud Platform to Create a New Client ID & Secret
1. Go to the Google Developers Console.
2. Click Select a project âž New Project âž the Create button.

3. Enter your Project name âž click the Create button.

4. Click OAuth consent screen in the left side menu âž choose User Type âž click the Create button.

5. Add Application name âž Support email âž Authorized domain âž Developer content information âž click the Save and Continue button.

6. Complete all 4 steps in OAuth consent screen âž click the Back to Dashboard button.

7. Go to Credentials âž click Create Credentials âž select OAuth client ID from the dropdown list.

8. Open the dropdown list Application type âž select Web application âž enter the name of your OAuth 2.0 client.

9. Enter your site URL in Authorized JavaScript origins âž in Authorized redirect URIs, enter the page URL where you wanted your users redirected back after they have authenticated with Google âž click the Create button.

10. Copy your Client ID and Client Secret.
From Local PC to Generate Google Drive Code and Refresh_Token
- https://rclone.org/drive/
Configuring using rclone authorize
On the headless box run rclone config but answer N to the Use web browser to automatically authenticate? question.
...
Remote config
Use web browser to automatically authenticate rclone with remote?
 * Say Y if the machine running rclone has a web browser you can use
 * Say N if running rclone on a (remote) machine without web browser access
If not sure try Y. If Y failed, try N.
y) Yes (default)
n) No
y/n> n
For this to work, you will need rclone available on a machine that has
a web browser available.

For more help and alternate methods see: https://rclone.org/remote_setup/

Execute the following on the machine with the web browser (same rclone
version recommended):

        rclone authorize "amazon cloud drive"

Then paste the result below:
result>
Then on your main desktop machine
rclone authorize "amazon cloud drive"
If your browser doesn't open automatically go to the following link: http://127.0.0.1:53682/auth
Log in and authorize rclone for access
Waiting for code...
Got code
Paste the following into your remote machine --->
SECRET_TOKEN
<---End paste
Then back to the headless box, paste in the code
result> SECRET_TOKEN
--------------------
[acd12]
client_id =
client_secret =
token = SECRET_TOKEN
--------------------
y) Yes this is OK
e) Edit this remote
d) Delete this remote
y/e/d>
Configuring by copying the config file
Rclone stores all of its config in a single configuration file. This can easily be copied to configure a remote rclone.
So first configure rclone on your desktop machine with
rclone config
to set up the config file.
Find the config file by running rclone config file, for example
$ rclone config file
Configuration file is stored at:
/home/user/.rclone.conf
Now transfer it to the remote box (scp, cut paste, ftp, sftp, etc.) and place it in the correct place (use rclone config file on the remote box to find out where).
Alist Mount Storage
Add storage
Fill in the values ​​obtained in the above process one by one.
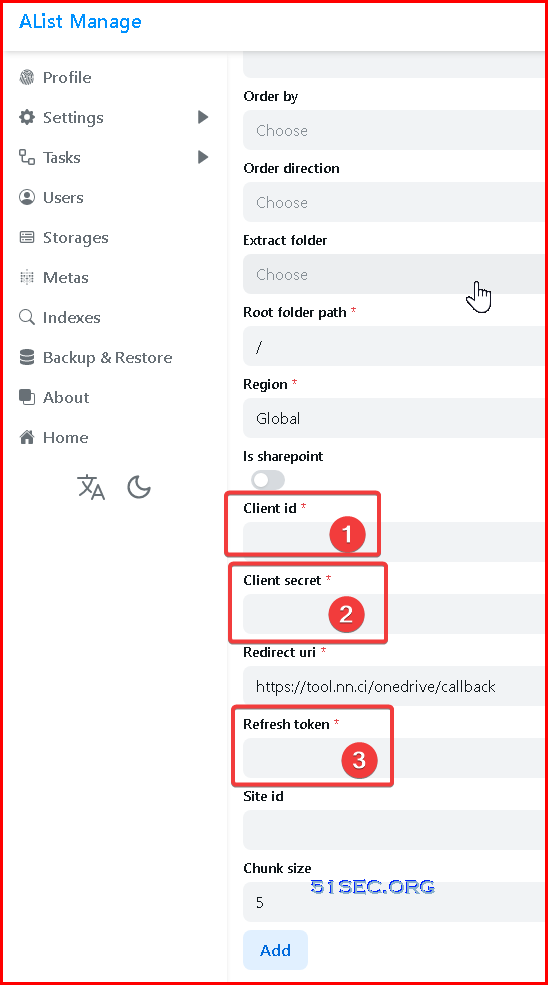
Get Sharepoint site_id
If you need to mount Sharepoint, after completing the previous step, an input site address will appear on the interface that displays the refresh token. After entering the site address, click Get site_id.
Root folder path
The default is /, if you need to customize, just fill in the path, starting from the root path, the same as the local path, such as /test
via Blogger http://blog.51sec.org/2023/01/rclone-usages.html
January 28, 2023 at 10:11PM Software
 RSS Feed
