Info Security Memo
  • Blog
  • Sitemap
    • Categories
  • Contact
  • About
  • Resources
  • Tools
  • 51sec.org

Build Confidence

Focusing on Information Security 

Info Security Notes

Configure IPv6 on Azure Virtual Machine

12/25/2021

0 Comments

 
Configure IPv6 on Azure Virtual Machine

IPv6 for Azure Virtual Network was generally available worldwide starting from April 2020. During testing IPv6 I found it is quite confusing with Microsoft document, especially how to use Web Console to assign a native IPv6 address to VM. 

Assigning a native IPv6 address means not using Tunnel or Load Balancer to get your VM to use IPv6 address. This post is to list all steps to assign a native IPv6 address to a existing Win10 virtual machine. It is same process for other type OS or a new VM.


Diagram

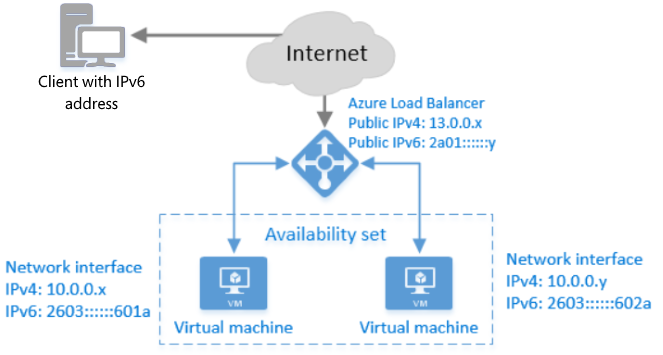
The following diagram depicts a simple dual stack (IPv4/IPv6) deployment in Azure:

IPv6 network deployment diagram


There are some limitation when deploying IPv6 in Azure Load Balancer. Please check following document:
  • Overview of IPv6 for Azure Load Balancer

The following picture illustrates the IPv6 functionality for Azure Load Balancer.

Azure Load Balancer with IPv6


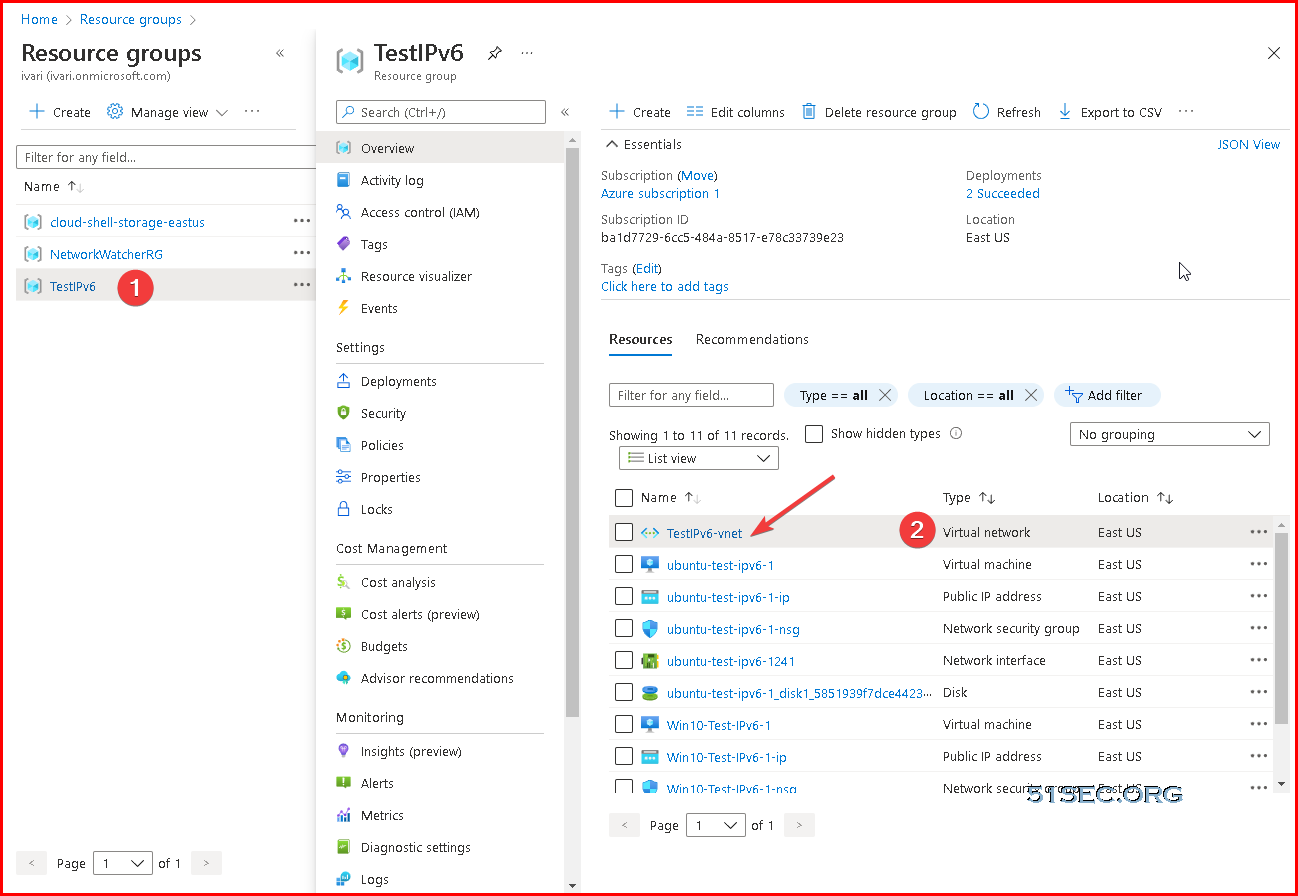
Configure Resource Gorup - Virtual Network

There are quite a few resources relating to IPv6 configuration. Here we are starting from Resource Group to check those related resources. The networking model for Azure is All VMs are connecting through a network interface (vNIC) which is attached to virtual network (vNET). So all configuration for IPv6 will need to start from the shared Virtual Network (vNET), such as adding a IPv6 CIDR.

1 Go to Resource Group - Virtual Network


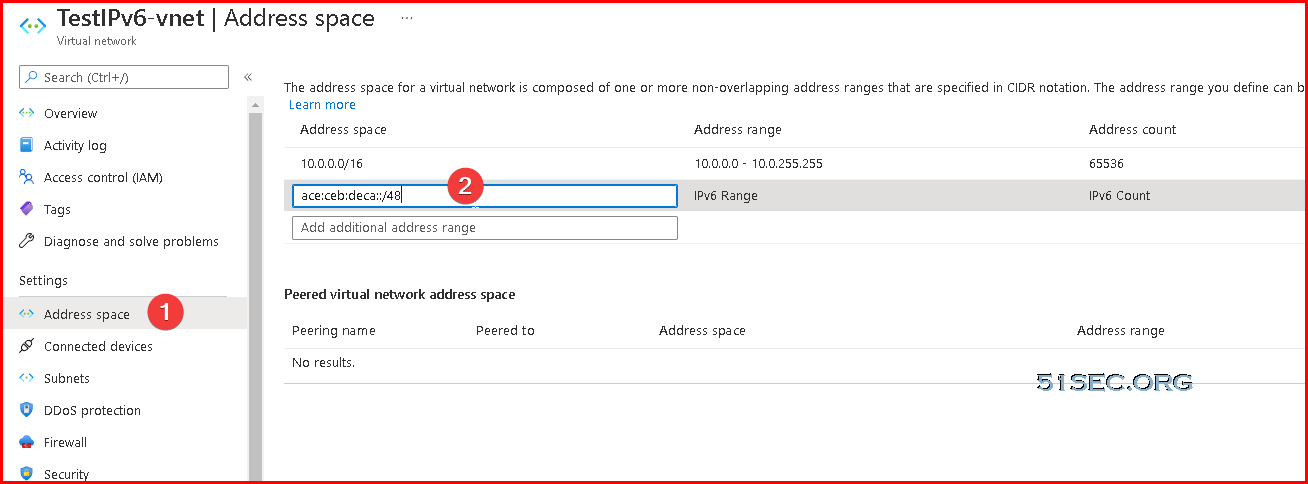
2 Create a new IPv6 address space

By default, your existing address space already has a IPv4 address space, 10.0.0.0/16. You can add additional address range to your this virtual network. As an example, I am using a Microsoft example Ipv6 space: ace:ceb:deca::/48 . You can generate your own local IPv6 segment using your mac address and time stamp in this website: RFC4193 IPv6 Generator


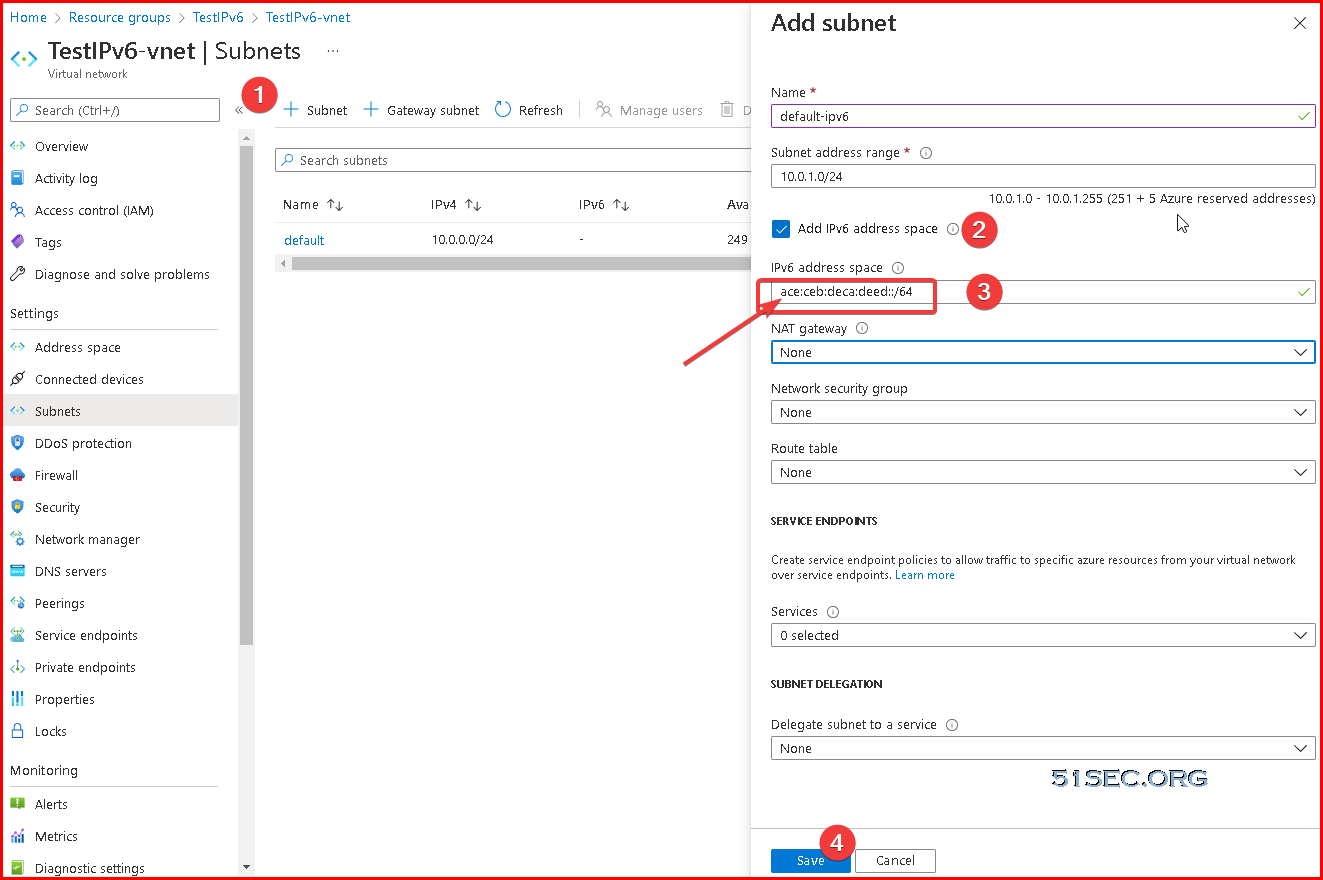
3 Configure your current subnet when the VM sites to use IPv6 subnet. 

ace:ceb:deca:deed::/64 is an example from Microsoft


Create a new network interface for existing VM

The existing VM's network interface is only for IPv4. There is no way we can allot an IPv6 to it using web console. In this case, we will create a new network interface to get a DualStack vNIC for your existing VM.

Search Network Interfaces and add a new one:


Most important one is to have a private ip address (IPv6) option checked. 
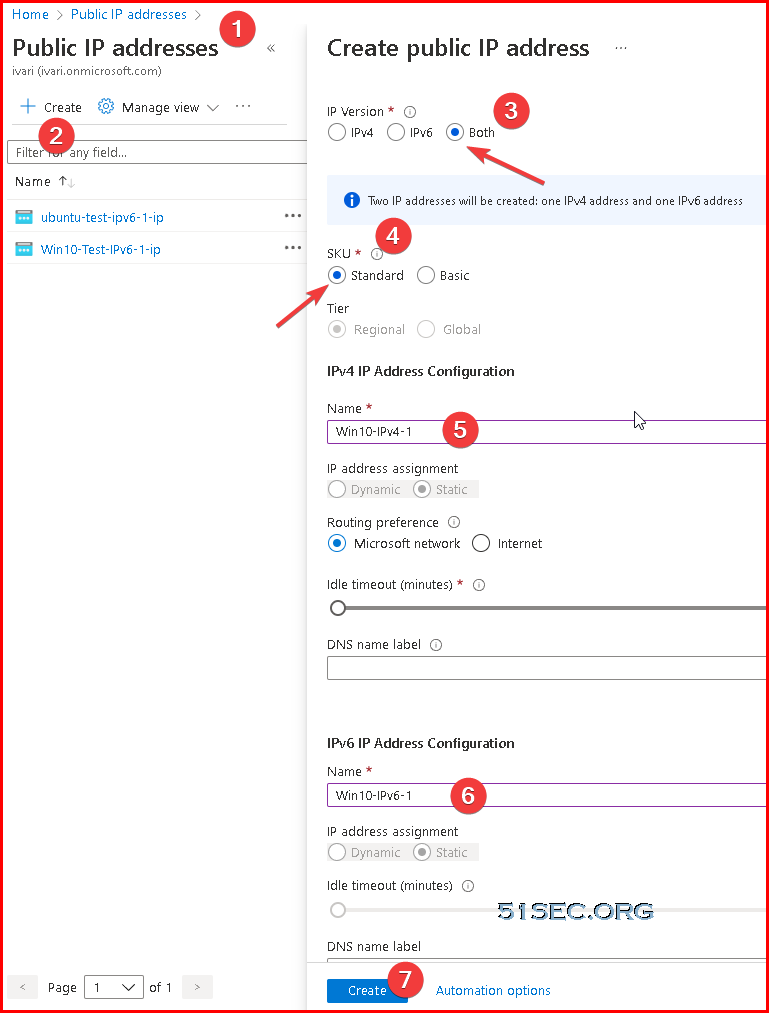
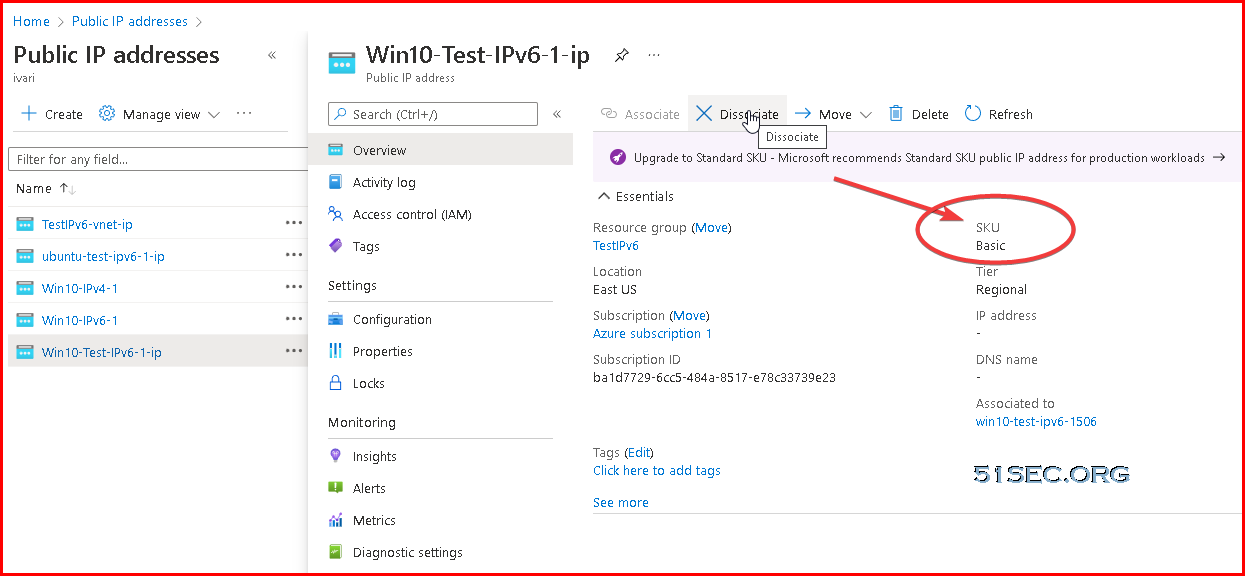


Create a Public IP

1 Keep existing IPv4

a. shutdown VM and set your Public IPv4 as static
b. dis-attach it from vNIC
c. upgrade SKU to standard SKU
d. Create a new IPv6 with your saved public IPv4 address


2 Create a new IPv4 and IPv6 address (Both)
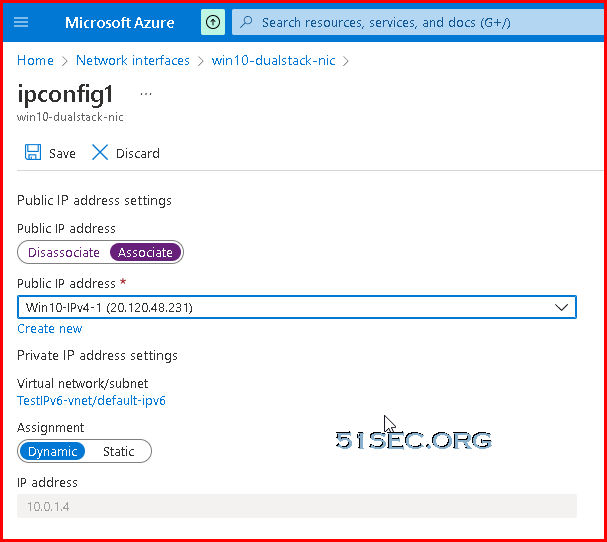
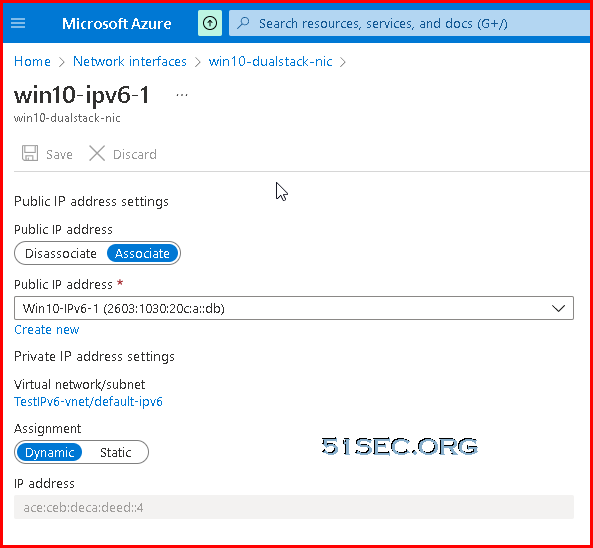


Attach IP to vNIC

In previous step, the ip addresses are ready. Now we can configure those ip addresses for our VNIC.


There are primary type ip and now is not associate with a public ip. We can associate one we created in previous step to it.


Same thing on secondary type ip, which is our IPV6 address, we will associate a public ip with it. 


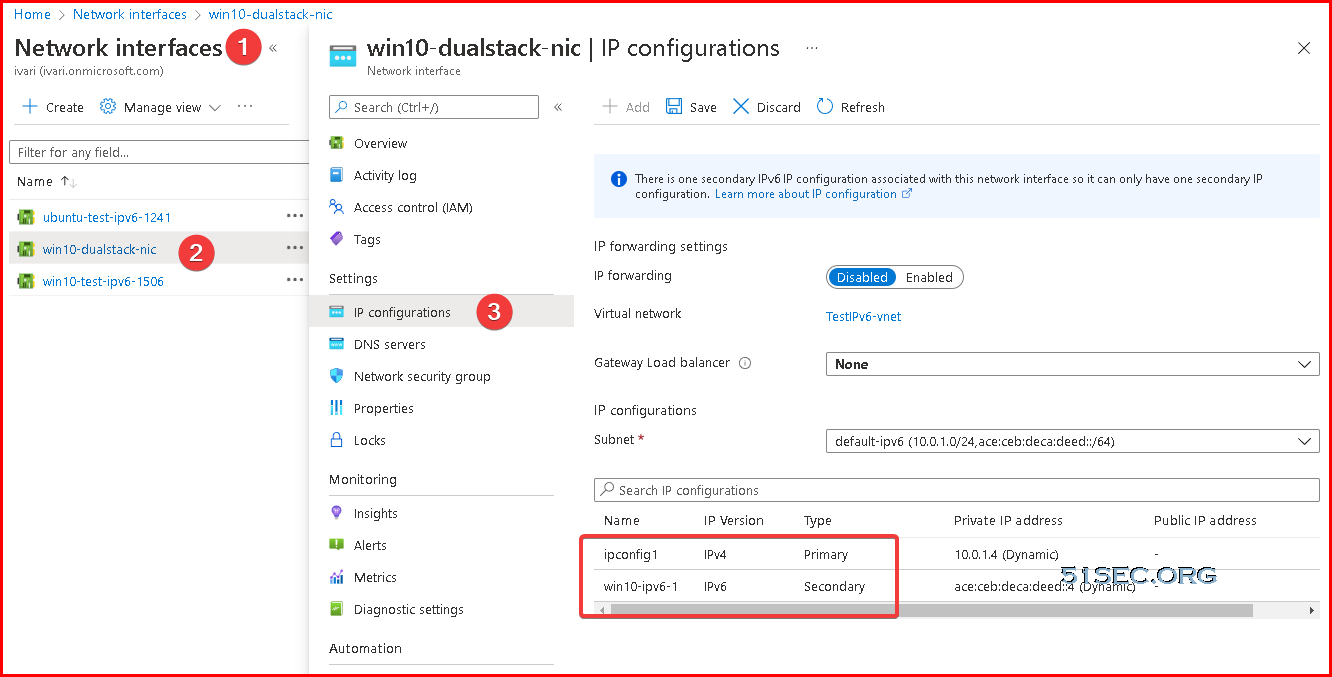
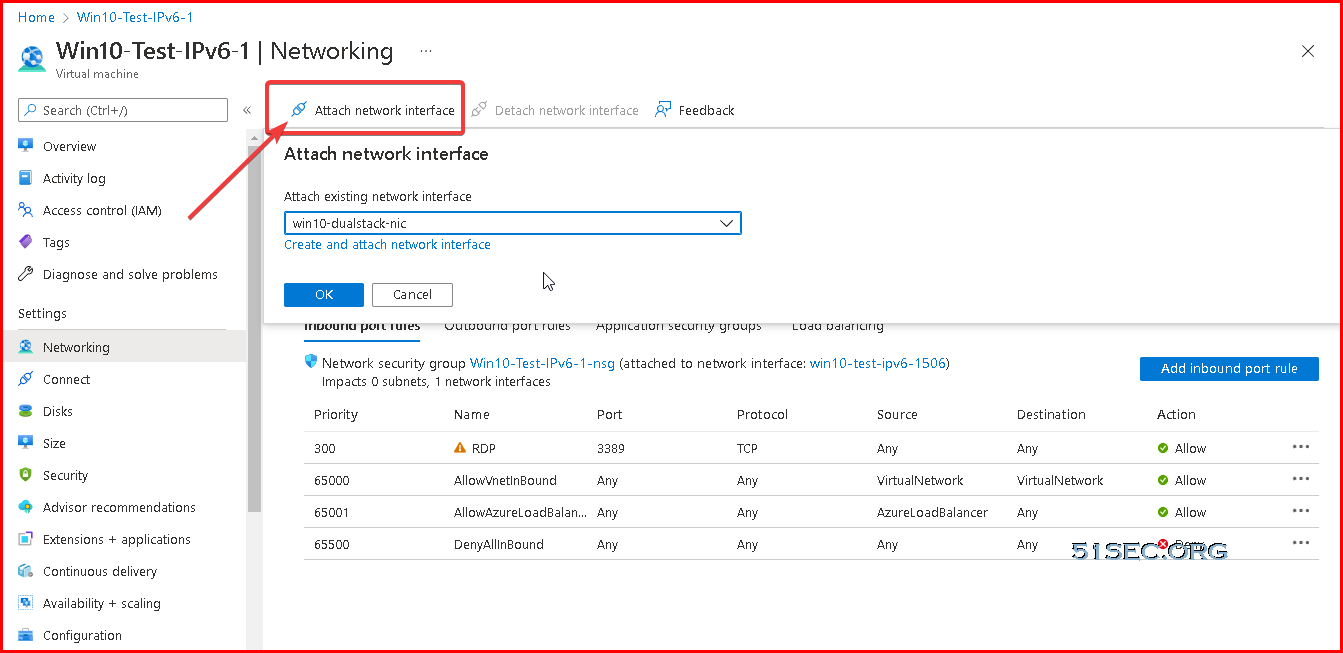
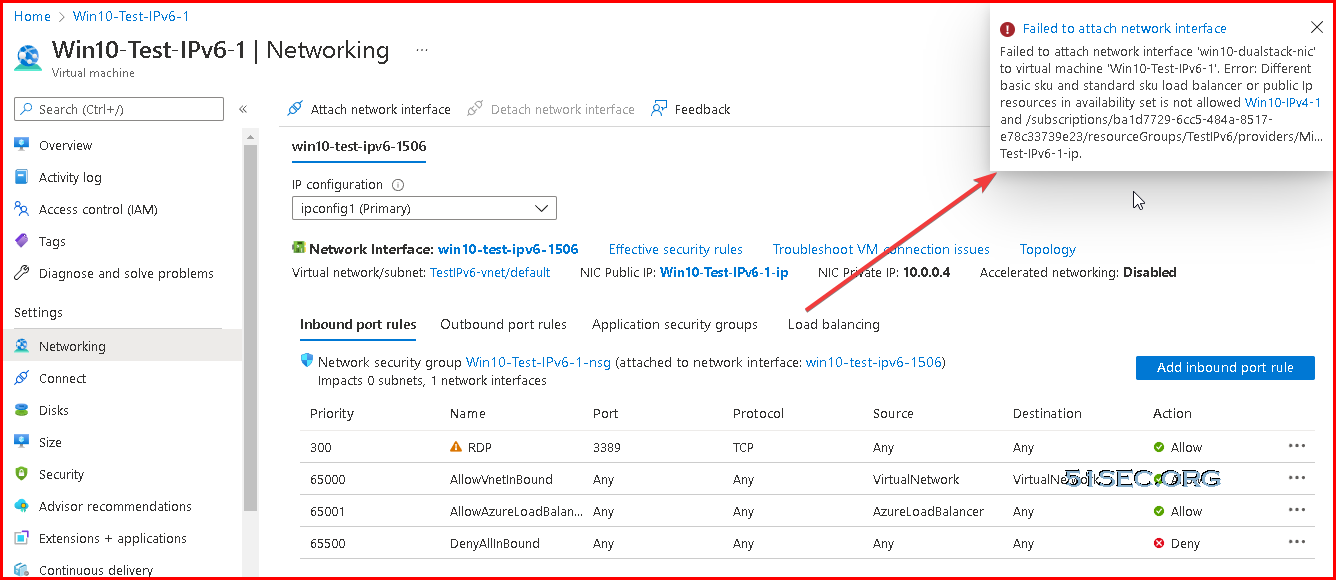
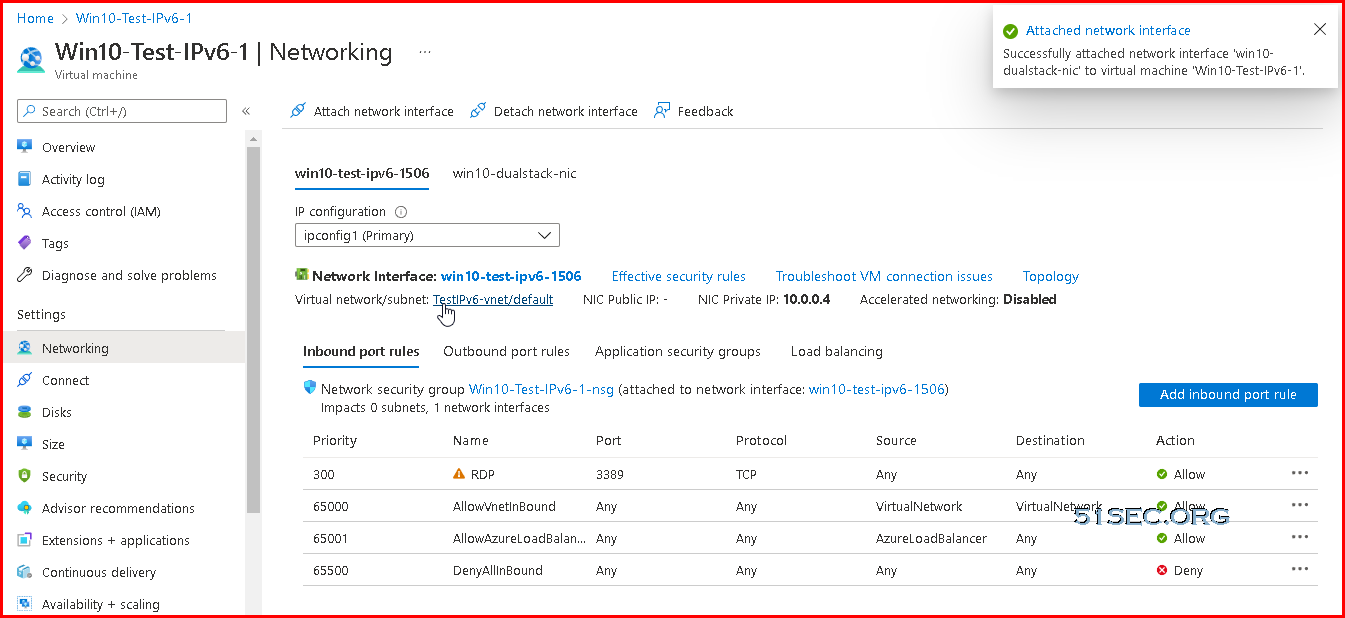
Attach new vNIC to VM

We have new vNIC with new addresses, which we can attach it to our VM now. 
1 Stop VM

2 Go to VM's networking page

3 Attach network interface

3 Different SKU issue


4 Dissociate existing Public IP which is using Basic SKU 

5 Now you should be able to attach the new created vNIC into this VM
And detach the old IPv4 vNIC from this VM.


Test your ipv4 and ipv6 ip address using Edge browser to open whatismyip.com website to verify you addresses. 


References

  • IPv6 for Azure Virtual Network is now generally available
  • What is IPv6 for Azure Virtual Network?
  • 【Azure】微软Azure开启原生IPv6支持


via Blogger http://blog.51sec.org/2021/12/configure-ipv6-on-azure-virtual-machine.html
December 25, 2021 at 03:37PM Cloud
0 Comments


Leave a Reply.

    Categories

    All
    Architecture
    Blog
    Checkpoint
    Cisco
    Cloud
    CyberArk
    F5
    Fortigate
    Guardium
    Juniper
    Linux
    Network
    Others
    Palo Alto
    Qualys
    Raspberry Pi
    Security
    SIEM
    Software
    Vmware
    VPN
    Wireless

    Archives

    March 2024
    February 2024
    January 2024
    December 2023
    November 2023
    October 2023
    September 2023
    August 2023
    July 2023
    June 2023
    May 2023
    April 2023
    March 2023
    February 2023
    January 2023
    December 2022
    November 2022
    October 2022
    September 2022
    August 2022
    July 2022
    June 2022
    May 2022
    April 2022
    March 2022
    February 2022
    January 2022
    December 2021
    November 2021
    October 2021
    September 2021
    August 2021
    July 2021
    June 2021
    May 2021
    April 2021
    March 2021
    February 2021
    January 2021
    December 2020
    November 2020
    October 2020
    September 2020
    August 2020
    July 2020
    October 2019
    September 2019
    June 2019
    July 2018
    May 2018
    December 2017
    August 2017
    April 2017
    March 2017
    January 2017
    December 2016
    November 2016
    October 2016
    September 2016
    August 2016
    July 2016
    June 2016
    May 2016
    April 2016
    March 2016
    February 2016
    January 2016
    December 2015
    November 2015
    October 2015
    September 2015
    August 2015
    July 2015
    June 2015
    May 2015
    April 2015
    March 2015

    Print Page:

    RSS Feed

    Email Subscribe
Powered by Create your own unique website with customizable templates.
  • Blog
  • Sitemap
    • Categories
  • Contact
  • About
  • Resources
  • Tools
  • 51sec.org